Tip 3: Inputs/Layers
The inputs channel probably isn't necessary for you to be awesome, but it's a time saver all the same and saving time is what we're about here. Before that, I guess I better tell you about the right hand part of the screen, the part you mostly ignore I'm sure.
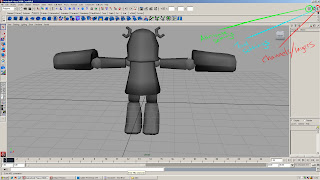
Anyway, the red line shows where the channels/layers box is, the blue is the tool settings, and the green is the attribute settings. For the most part you can ignore the tool settings, just know that it's there if you want to change something about the tool you're using. For example:
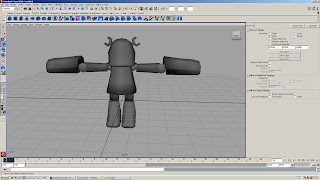
This is what the tool box looks like with the move tool selected. I can change whether I want to move objects with World settings, Object settings, or Normal settings (the only 3 you should care about). I'll get to World and Object later, Normal is good for smoothing out objects after you've added vertices. If there's something weird with your tool or it's not behaving the as expected, just reset the tool and see if that fixes it. Or call Bayonetta so she can punish it like the bad boy it is.
As for the attribute editor, it controls/modifies things that are often far too complicated to care about.
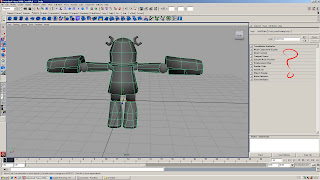
So for the most part you can ignore this, but this is where you find it should you ever need it. If there's something I'm overlooking, I don't remember what it is, but if I remember I'll tell you how useful the attribute editor is and how you're foolish for not using it.
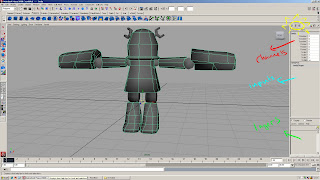
Ok, the main dish is the channels box. The channels box is often split into 3 different areas. You have your channels (red), your inputs (blue) and your layers (green). You can hide and show different aspects of the channels box by pushing one of the buttons above it (yellow). Generally, you want to keep the layout as you see it here.
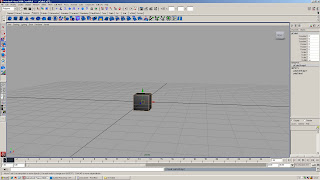
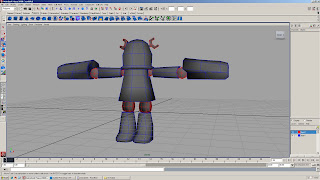
Anyway, let's continue this thing with a simple box. I'll just hide this crappy robot and make a cube. If you look in the inputs box, you'll see something that says "polyCube1". The inputs section basically records what you've done to the object, so if I were to soften the normals on it...
You can see how it is recorded here. The good thing about this is that you can modify your inputs later on (you can delete history to clear inputs). So what's the point of knowing this? Well, clicking on polyCube1 opens up more options for us.

From here we can see that we can modify the subdivisions here as well as the height/width/depth of an object. You can input the numbers you want manually or you can click on the word you want to modify which highlights it in black.
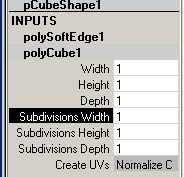
And MMB drag on the viewport to change the values. You see, there's a quick way to do everything. You could do the same thing by creating a primitive, going in the options box, selecting how many divisions you want before making the object then create it. But this way is so much faster and non-destructive it's not even funny (well, a little funny). Note: Doing this after modifying the object (like moving verts, deleting parts, etc) gives weird results.
Anyway, that MMB drag on the viewport thing works for most options that can be highlighted black. There are a lot of commands seemingly hidden in Maya, so it helps to experiment sometimes.
Now for the channels, there's a lot you can do with this but generally for modeling, you don't have to be concerned with much. They become much more important when rigging and animating, and usually those aspects are why you want to freeze transformations. However, if you want to move your object a certain distance or rotate it a certain degree, you can do it here. If you want to undo it, you could just put 0 in all the channels (well, 1 in the scale). Freezing transforms resets all this information, so whatever you did to it before becomes the new normal state. Perhaps you want to hold off on freezing transforms until you're certain about the objects placement and size (that's what she said?), or maybe you don't. I'm not telling you how to model. There are some cool things you can do with this when it comes to flipping models, just add a minus sign to the beginning of the numbers and you can get more changes, but I'll get to that later... maybe.
Finaaaaally, laters. out of everything in the channels/layers box you'll be using this the most. Creating a new layer is easy, just click on this red button or go to Layers > Create Empty Layer.
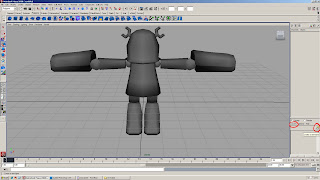
This creates a new layer to which you can add objects to. To do this, select the object, right click on the layer you want to add the object to and select "Add selected objects", it's worded like this because you can add more than one object to the layer. Removing the objects is pretty self-explanatory, it's done the same way, just with another option in the same section (common sense goes a long way). Now that we have an object in our layer, what can we do with them?
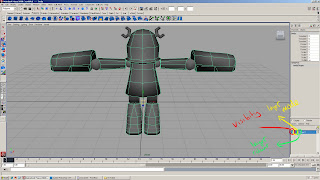
This shows you a few options you have when working with layers. The red part (with the V) shows you the visibility of the layer. Clicking on this hides everything you have in that layer, so it's different than hiding things with CTRL+H. If you hide a layer with a hidden object, the object will stay hidden even after you turn the visibility back on. Essentially this is a different way to hide objects without using the outliner, but do be aware that they both stack (in case you want some super ultra hidden object).
Next to that is the layer mode. Clicking on this once causes a T to enter the box. This is template mode:
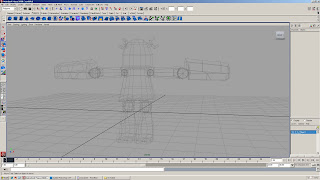
In this mode you'll be able to see a wireframe of your object, potentially allowing you to build around or on top of it. You can't select object in template mode (well, you can with the outliner but...) which makes it useful if there are a lot of things blocking your view but you still need to see them. This save on memory because everything is in wireframe mode and not shaded.
Clicking on the box again causes an R to appear, this is reference mode:
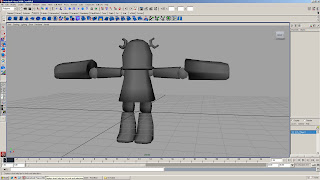
This mode is similar to template, except everything is shaded (so it works with x-ray, textures, lighting etc). The reasons to use this are pretty much the same as template, but most people tend to use this mode. Clicking on the box again causes things to go back to normal.
The final thing next to the template/reference box is the layer colour box, which causes the wireframe on the object to become coloured. This can be used to easily identify which objects are in which layer. To add a layer colours (and incidentally, change the name of the layer) you need to double click on the layer:
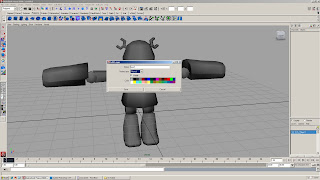
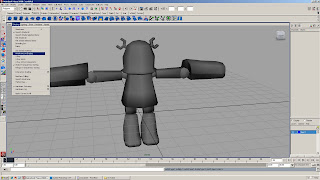
I changed a couple of the colours, but you can see it's easy enough to modify your layer from here. Do note that when naming layers here you need to manually type in the underscores, it doesn't add them automatically like with the outliner. I put on the wireframe from the shading tab.
Tip 4: Movements... and stuff.
Knowing how to move objects can be useful when modeling for obvious reasons. Giving specific examples of when would be difficult and troublesome, but once you know you'll find places to use it. Usually the move tool manipulator looks like this:

Notice the yellow box at the centre of the manipulator? As you may know, you can move objects by selecting the R/G/B handles (which turns the active handle yellow, keep a note of this) and pushing or pulling the object/vert/whatever along that axis. If you were to click on that yellow box and move stuff around, you would move it according the the position of the camera. However, you can CTRL + left click on one of these handlers to lock that axis. Yeah, I know, complicated words. It's easier for you to understand if you try it. CTRL + left click on the Z handle (blue).

Notice the yellow box now? It's not a square that follows you around any more as you rotate the camera. It's a square that always faced forward, towards the Z axis. If you were to select the box and move it via the yellow box now, you would only move on the X and Y axis, there will be no Z axis movement. You can still move in the Z axis by selecting that handle though. You can do this for the X and Y axis as well. If you want to return the movement to how it was before, you can CTRL + left click on the yellow box.
Sidenote: A quick thing on snapping, and snapping using constraints. If you hold V, you can snap to points. Basically, what this means is that if you have a vertex selected, you can hold V, and MMB drag over another vertex, and the vertex you selected will snap to that position. Now, remember when I said that when you select a handle it turns yellow? If you do that, select a handle direction (preferably one that goes in the direction you want), hold V and MMB drag. Notice how your vertex stays constrained to that axis. Very useful for lining up vertices.
Oh yeah, you can do that point snapping thing to pretty much anything, objects, faces, edges, groups of vertices, whatever. You can also hold X to do some grid snapping.
Moving on.
I mentioned the tool box before, so getting to something about that. The move tool (the only one you really want to change the mode for) has a few different options that are useful.
World mode moves an object according to the world coordinates, so no matter where the object's rotation, the object moves the same.
Object mode moves an object according to the objects rotation. So if you were to rotate an object:
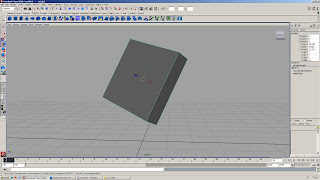
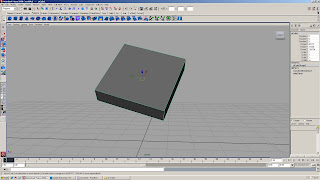
You can move it according to it's rotation. This apples to vertices, edges, etc, so it's useful if you've just rotated an object and want to tweak the vertices on it without the awkwardness that World mode provides. Do note, that if you freeze the transformations of an object (or combine it) most of the things you can do with Object mode disappear. I find it most useful when moving alpha planes to make hair.
That's all for now. Next up, UV'ing for dummies.
Thanks for posting this, it's lovely to be on the receiving end.
ReplyDeleteVery useful and I'm looking forward to the uv'ing for Dummies now.
Yey verily ;-)