Jesus, why the hell did I learn such a scary bitch of a program? Anyway, moving on.
Tip 1: The Shelf.
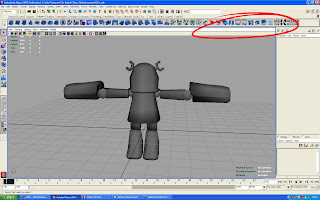
This is your shelf, the long line that I circled in red. Up here, there are shortcuts to various commands that will make your life easier. Adding commonly used commands here will cut down the time you spend navigating through menus. You may not think it cuts down a lot of time, but it certainly cuts down on strain. 3D work is all about endurance, and this is the best way to not get burnt out.
To add commands to the shelf, all you need to do is highlight a command.
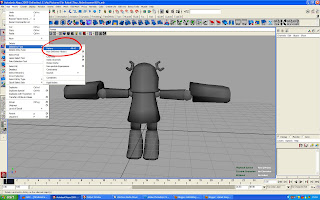
Hold CTRL and SHIFT, then left click on the command you want to add to your shelf.
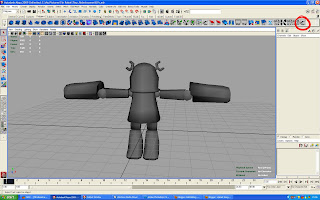
See how it was added to the end of my shelf? Yes folks, it's THAT easy. If you ever find yourself using a command quite often, do yourself a favour and add it to your damn shelf! There are 3 items you should always have on your shelf.
Delete History (unless you're used to pressing Alt+D)
Freeze Transformations
Centre Pivot
These three alone will help you keep a clean scene. You'll see various other commands on my shelf, another one of my favourite things to have on my shelf is the Multilister (Windows > Rendering Editors > Multilister) or the Hypershader and the Outliner (Windows > Outliner). You'll often be opening both windows very often.
Now, if you want to rearrange a command on your shelf (like move delete history somewhere else), just Middle Mouse Button (MMB) and drag the command across the shelf and move it someplace else. Easy. If you want to delete an item on your shelf, MMB and drag the item over to the trash can (red circle).
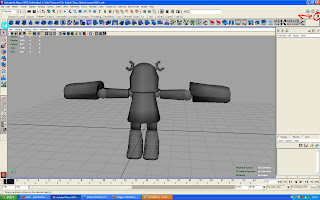
So easy, useful and awesome I might just vomit. There, now you know about the shelf. You can also edit your shelf in different ways by left clicking on the little arrow (blue circle). Just go to edit shelf. Alternatively, you can make your own shelf, full of useless crap you think you might need.
Tip 2: USE THE GODDAMN OUTLINER!
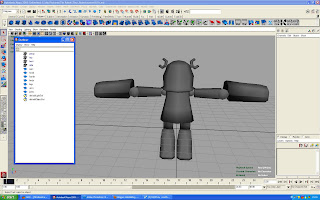
I can't stress this enough, the outliner is important for clean, organised and speedy modeling. Especially when doing environments. Do you know where Polycube105 is? No? Well neither do I! In your outliner (you can do it in other places as well, which helps when naming bones), you can name your polygon objects, bones, IKs, clusters, etc so you know what it is you're selecting, you can easily find objects in your scene and most importantly, if you hide something, you know where the object is when you unhide it. It also shows you transforms, deforms and all that crap (protip, those'r usually bad, clean them up).
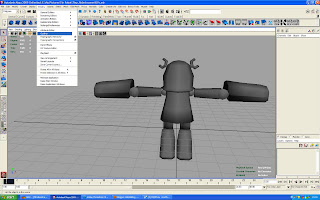
To access your outliner, go to Windows > Outliner (if you have ADD and skipped over the first tip, go read that and add the outliner to your shelf, like, now).
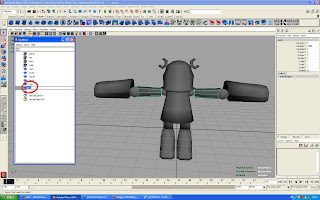
To rename an object, double click one of the objects in the outliner (for instance, arms) and type. You may think you have to add a dash or underscore when typing, but you can actually just use the spacebar when typing, and the underscores get automatically added! Instead of typing LOOK_AT_ ME, you could just type LOOK AT ME, and when you press enter underscores will have been added.
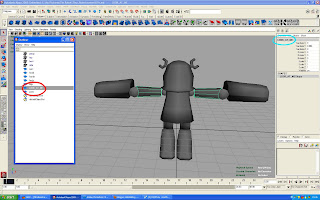
There, now you know how to rename an object in the outliner (red). You can also rename objects by double clicking the name of the object where the blue circle is. This actually works better when renaming bones, since you can use the Up and Down arrows on your keyboard to move up and down the chain (hierarchy).
Apart from left clicking on objects to select them, you can MMB and drag objects around to change the order of the objects. When you drag, you need to place the object between two others (there'll be a single line), otherwise you might accidentally end up parenting that object to another. If you do parent objects together (or have parented objects in your scene), there'll be a + sign next to your object, click that to open up the hierarchy.

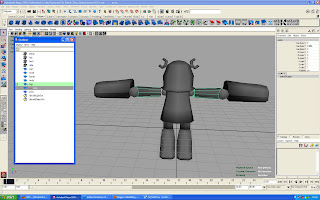
You can then MMB drag the object away and unparent it; you'll be able to reposition the object in the outliner as you please.
You can also hold CTRL and select multiple objects when left clicking, or hold SHIFT and select a long column of objects. It works pretty much like windows explorer, you can figure that much out pretty easily. It's good if you want to select multiple objects to hide or unhide, or perhaps combine, whatever. You can use your imagination to decide what you use it for.
Do note, that I've also showed you how to parent objects via the outliner, which can give more predictable results than randomly selecting 2 objects and hitting P on the keyboard. The parent will always be on top (shown first) and the child(ren) will be beneath the parent. Sounds like some kinda sick joke.
Remember to name your objects often, if you combine or extract your models, you'll need to rename them, you'll also have to clean up your models afterwards. Let's see what happens if we combine two objects together.
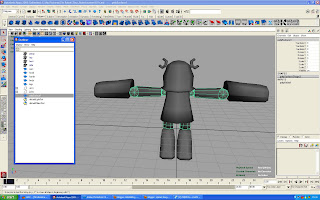
See what happens? Those white boxes are usually never any good. This is the first sign your scene is becoming messy and you need to clean it up. I combined the arms object and the joints object together, the end result is the Polysurface1. I need to rename that now. I also need to delete the history.
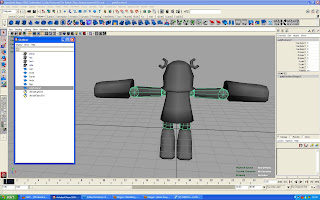
Now you can see my scene is clean, and I've combined both of the objects together. In short, the outliner is very very useful, you should use it more. It's good for more than I just mentioned, and it's pretty much a necessity when building your own rig. I don't even want to think about rigging without the outliner.
Now, quickly, how to hide and show objects. Simple really, highlight an object and press CTRL+H. It will disappear. This is handy for all sorts of reasons, I won't go into why. But now, you want your object back, but where the hell is it?
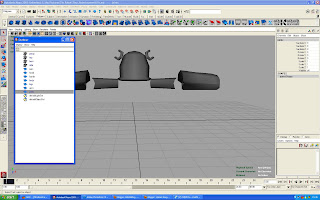
Easy, open the outliner. Notice how the hidden objects now have blue names. Highlight them in the outliner and press SHIFT+H. Your objects will now magically reappear! Congratulations, you are wizard.
That's all for now, I'll add a few more things tomorrow. Like um, the inputs channel, layers, and uhh, selection modes.
Hey man!
ReplyDeleteFirst of all, thanks! During my nightmare period with Maya yesterday, your tutorial proved very useful. Got my shelf sorted now which is good. Looking forward to part II =)
Secondly, I checked about FFXIII for you and guess what? Our company has already filled our quota for pre-orders as of last weekend (which amount to a total of about 10 =S ). Yet another embarrassing part in the Gamexchange saga! You should probably think about going into a REAL shop, hehe =P Ben works for Gamestation so try asking him! Sorry dude!
No problem man, I'm posting the rest of the stuff later on today. If there's anything you need help with or need me to cover for you, let me know.
ReplyDelete